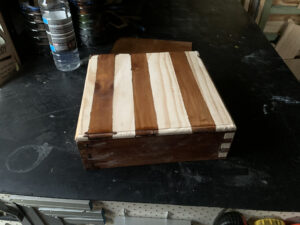
I’ve been watching a lot of videos on Facebook about people making various things out of wood and one of the common techniques involves glueing together strips of wood in order to create a decorative pattern. This is something that I hadn’t tried before, so I decided that I would give it a shot with a decorative box.
The other technique that I wanted to try was to create fillet around the edge of the lid, so that it fit snugly into the box proper, by using the router.
Finally, I thought that I could create an interesting pattern by only staining two of the sides of the box, and therefore create an interesting contrast between the light and the dark.
IN order to do this, I started by cutting the lengths with my mitre saw, and then using the Gifkin jig to dovetail the edges. This went reasonably well, although the joins were not quite as snug as I had hoped. I might change the bearing on the router bit to a slightly smaller one in the next iteration. I then used the table saw to cut length before gluing them together. In hindsight, I should have stained them before gluing them, as I then had to use some tape to cover up the parts that I didn’t want to stain. This led to some bleed, but I was still reasonably satisfied with the results.
However, where I really ran into trouble was with the routing of the fillet on the lid. I wanted to make a 20 mm fillet around all four edges. While three sides when reasonably well, the fourth really got away from me. In hindsight, I think I need to be a little more patient when it comes to routing. Smaller cuts, more often.